
A while ago I bought two NES30 Pro Retro Gamepads. They are really nice and good quality, and support different modes, plain Gampad mode, or they can emulate keyboards which is handy for games which do not come with support for gamepads out of the box. And with the latest firmware update the OSX support was improved, so that the analog sticks become usable.
But you don’t own a product until you opened it up (at least if you are an engineer). So here some shots of the inside of the NES30 Pro with some comments:

Start by popping of the bottom plate, e.g. by sliding your fingernail in the gap under one of the L1/R1 Buttons, then slide it towards the side until the bottom plate starts to pop off.

After the screws have been removed the top side can be removed and we see the main PCB. Before it can be removed make sure to open the flat-flex cable connector. Try to not touch the carbon contacts for the buttons too much. Removing the PCB is a bit tricky because it sits tight in the housing. Wiggle it around a bit, but don’t pull to hard because otherwise flat-flex cable can be destroyed it gets stuck somewhere.
The analog sticks are on a second PCB. For safety I pulled the battery connector.

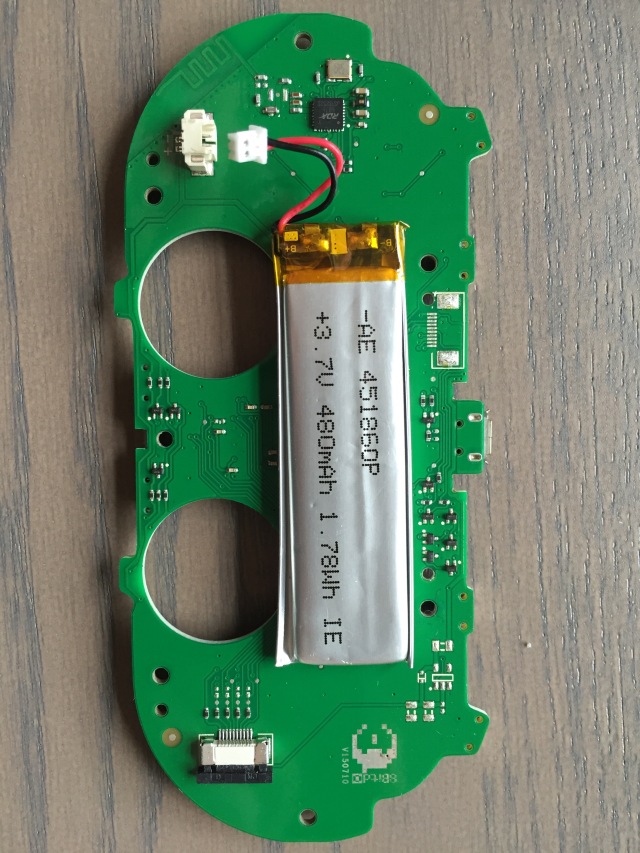
Nice PCB artwork 🙂 (8bitdo Logo in the lower left corner)

The battery. Next to the battery a mystery unpopulated header?

The bluetooth chip. The chip label says RDA 5876. Manufacturer is RDA Micro
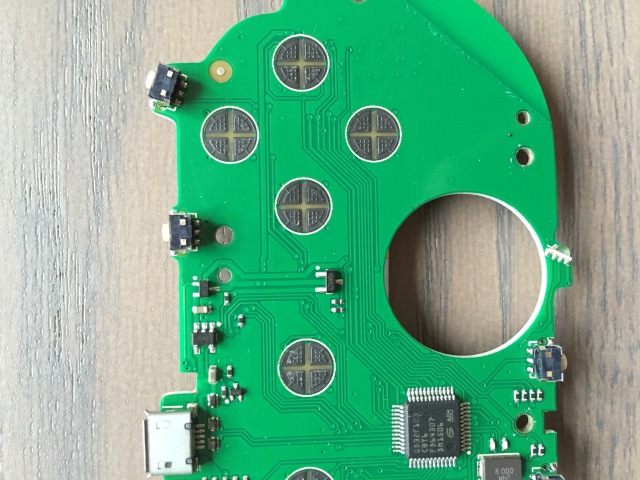
The main processor is a chinese clone of a STM32F103
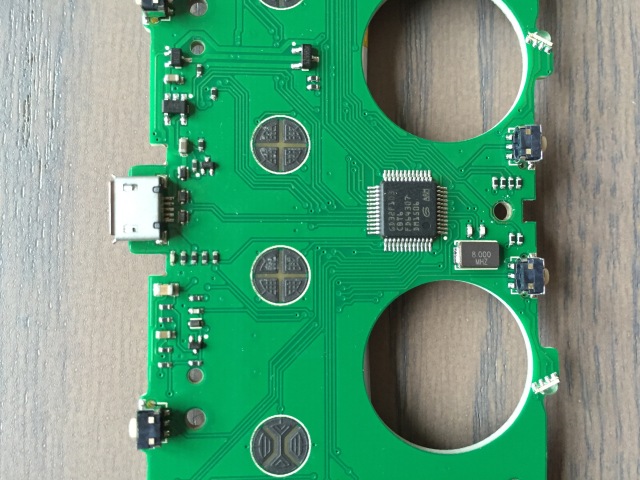
The main processor is a chinese clone of a STM32F103
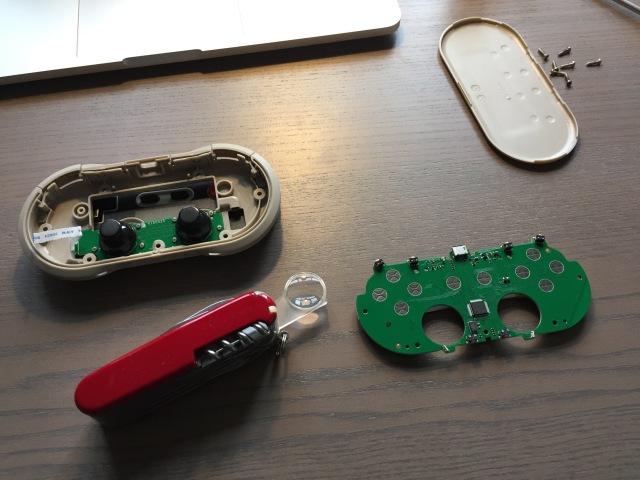
Overview of the parts with my trusty swiss knife.

My R1 is stuck any idea how to fix it?
LikeLike
First you should try to find out what is stuck, the actual push button switch, or just the plastic lever that actuated the push button switch.
LikeLike
40$ for a simple PCB with a fake proccessor (…)
8Bitdo are scammers
LikeLike
Yeah I guess the price is on the higher end, but on the other hand they fill a niche and they are probably not selling tens of million gamepads. As long as there are enough people that pay that price it is not too expensive.
Working in the semiconductor industry myself I can say that producing „clone chips“ is a daily practice even for the big companies. So what is fake and what is not is debatable. If big semiconductor companies hire and fire Chinese designers pretty much on an at will basis, they can’t complain that those designers at some point start their own company.
LikeLike
Is it easy to disconnect the battery connector? Can i do it just removing the back cass like in the first picture? Whats the best way to do it?
LikeLike
Yes, you only need to remove the back case, and then unplug the battery. The battery is glued to the PCB with double sided stickytape but can be removed with some force. Just do not use a sharp object as you might accidentally pierce the battery or it could explode in the worst case.
LikeLike
What is the make and model number of the joysticks. Also, any more pics of them ?
LikeLike
Sorry for the late response. No I don’t have more pics of the joysticks
LikeLike
my R1 button sticks out of the controller (my english isn´t very well)
how can I fix it
LikeLike
Have you opened it up to see whether you can push it back in?
LikeLike
How do I desolder the small and broken button in R1??
LikeLike
The hardest part is probably getting the solder on the ground connections to melt. Be careful not to apply too much force on the button when desoldering it. If I remember correctly its all surface mounted, so it should just fall of by itslef once all solderjoints are molten.
It works best if you use a hot air gun to heat the button carefully until you can remove it. Or preheat on a lower temperature using a hot air gun / hair drier and then do the rest with a soldering oron with a relatively big tip (4mm). Preheating will make it quicker to get the solder joints to losen and reduces the stress on the board.
Other tips: Sometimes it helps to first snap of the ground shield with a wire cutter. Then desolder the button and the remaining bits of the ground shield separately.
LikeLike
What are the tactile switches on the Pcb?
LikeLike
They are for the shoulder buttons (L1, L2, R1, R2)
LikeLike
And the Switches between the Joysticks are for On/Off and for Bluetooth connection (and switching between the different controller modes).
LikeLike